

These Painted Chocolate Fruit Tartlets are a stunning dessert that balances crisp, buttery pate sable shells with a luxurious chocolate lining. The interior is filled with a light, tangy crème fraiche whipped cream that pairs perfectly with fresh seasonal fruits like berries, figs, or stone fruits. The “painted” technique creates a beautiful glossy shell that protects the pastry from sogginess while adding a decadent chocolate flavor. They are perfect for elegant dinner parties, bridal showers, or as an impressive yet manageable make-ahead dessert.
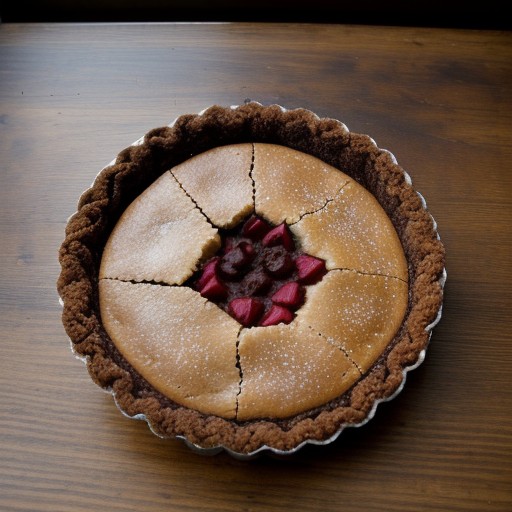
Painted Chocolate Fruit Tartlets
Description
These Painted Chocolate Fruit Tartlets are a stunning dessert that balances crisp, buttery pate sable shells with a luxurious chocolate lining. The interior is filled with a light, tangy creme fraiche whipped cream that pairs perfectly with fresh seasonal fruits like berries, figs, or stone fruits. The "painted" technique creates a beautiful glossy shell that protects the pastry from sogginess while adding a decadent chocolate flavor. They are perfect for elegant dinner parties, bridal showers, or as an impressive yet manageable make-ahead dessert.Directions
-
Prepare the pate sable dough according to your recipe, then wrap it in plastic wrap and chill for at least one hour or up to 3 days.
-
Remove the dough from the refrigerator, knead it briefly into a 12-inch log, and cut into even pieces based on your tartlet mold size (8-10 pieces for 4-inch, 12 for 3-inch, or 14-16 for miniature).
-
Lightly dust a piece of plastic wrap with flour, place a piece of dough on it, cover with another piece of plastic, and flatten with your palm.
-
Roll the dough out to a thickness of about 1/8-inch, ensuring it is about 3/4-inch larger than the mouth of your tartlet mold.
-
Peel the dough off the plastic and center it over the mold, using floured fingers to gently press it into the bottom and sides.
-
If using tartlet rings, rotate the ring on a floured surface while pressing the dough against the bottom and sides with floured thumbs to form a square bottom edge.
-
Place plastic wrap over the top of the mold and press down with your hand or a small rolling pin to cut off excess dough; if using rings, shave off excess with a paring knife.
-
Remove the plastic and press the dough up around the sides so it extends slightly above the rim, then dock the bottom a few times with a fork.
-
Place the filled molds in the freezer; if using rings, place them on a sheet tray in the freezer. Repeat with remaining dough.
-
Preheat oven to 375 degrees Fahrenheit (191°C).
-
Place the frozen tartlet molds on a sheet tray and bake immediately for 10 to 15 minutes, until the bottoms begin to color and edges are lightly browned.
-
Remove from oven and cool completely on a rack; if using rings, slip the ring off and transfer the shell to the rack with a spatula.
-
Tip the cooled shells out of the molds onto your hand; if they stick, gently insert the point of a small knife between the shell and mold to release.
-
Melt the bittersweet chocolate in a bowl over simmering water or in the microwave until about 3/4 melted, then stir until completely smooth.
-
Using a dry pastry brush, paint the melted chocolate onto the bottom and sides of each tartlet shell.
-
Chill the painted shells just until the chocolate sets.
-
In a bowl, combine creme fraiche, heavy cream, confectioner's sugar, vanilla extract, and vanilla bean seeds.
-
Whisk the cream mixture until soft peaks form, being careful not to over-whip.
-
Pipe the cream filling into the chocolate-lined shells using a pastry bag fitted with a #5 tip, filling them about 2/3 full.
-
Top each tartlet with fresh fruit and serve.
Nutrition Facts
Servings 10 pies
- Amount Per Serving
- Calories 209kcal
- % Daily Value *
- Total Fat 10 gg16%
- Saturated Fat 2.7 gg14%
- Cholesterol 80 mgmg27%
- Sodium 76 mgmg4%
- Total Carbohydrate 18 gg6%
- Dietary Fiber 1 gg4%
- Sugars 12 gg
- Protein 3 gg6%
* Percent Daily Values are based on a 2,000 calorie diet. Your daily value may be higher or lower depending on your calorie needs.
