

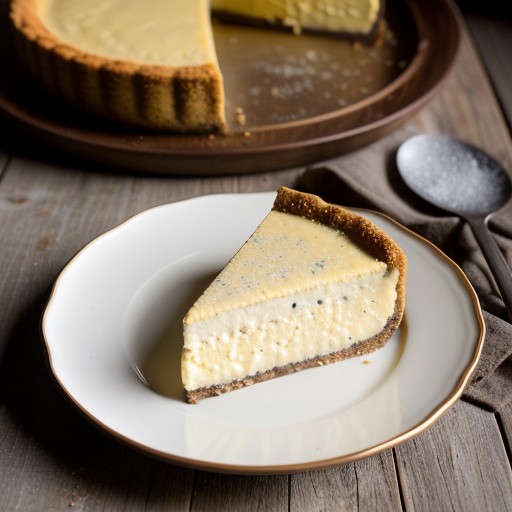
Lucerne Cheese Torte Part 1
Description
This recipe provides the foundational sponge layer for a Lucerne Cheese Torte. It is a classic genoise, known for its light, airy texture and rich egg flavor. Unlike butter cakes, this batter relies on whipped eggs for lift, creating a structure that is sturdy enough to support heavy cheese fillings yet tender enough to melt in your mouth. The key to success is proper whipping of the eggs and sugar to achieve significant volume before gently folding in the dry ingredients. This cake layer is versatile and delicious on its own, but it truly shines when paired with creamy mascarpone or ricotta fillings. It is an elegant choice for afternoon tea, special celebrations, or as a sophisticated dessert that showcases technique and quality ingredients.Ingredients
Directions
-
Position a rack in the lower third of the oven (about 5 to 6 inches from the bottom) and preheat to 350&# 194;°F (175ðC).
-
Grease the bottom and sides of an 8-inch round cake pan with solid shortening or butter.
-
Dust the greased pan generously with all-purpose flour, tilting to coat evenly, then tap out the excess. Insert a parchment or waxed paper liner.
-
In a small bowl, sift together the cake flour, 1 tablespoon of sugar, and salt. Set aside.
-
Melt the unsalted butter in a small saucepan over low heat. Pour into a small mixing bowl and set aside.
-
Crack the eggs into the bowl of a heavy-duty mixer. Add the 1/2 cup of granulated sugar and whisk by hand briefly to combine.
-
Place the mixer bowl over a shallow pan of hot water (about 120ðF/50ðC) to create a makeshift double boiler.
-
Whisk the egg and sugar mixture continuously for about 30 seconds until warm to the touch (body temperature, approx 110ðF/43ðC). The sugar should begin to dissolve and feel smooth, not granular, when rubbed between fingers.
-
Attach the bowl to the mixer with the whisk attachment. Whip on medium speed until the mixture has cooled, tripled in volume, turned pale white, and thickened to the consistency of a ribbon (about 3 to 4 minutes).
-
Pour in the vanilla extract during the final moments of whipping.
-
Test for readiness by lifting the whisk; if the mixture falls back in ribbons that remain on the surface briefly, it is ready. If it sinks immediately, whip for a few more minutes.
-
Remove the bowl from the mixer. Using a flexible spatula, sprinkle one-third of the flour mixture over the egg batter. Gently fold until just incorporated.
-
Repeat the folding process with the remaining flour mixture in two more additions, being careful not to deflate the batter.
-
Pour about 1 cup of the batter into the melted butter and fold until fully combined.
-
Return the butter mixture to the main batter and gently fold until smooth and uniform.
-
Pour the batter into the prepared pan. Smooth the top with a spatula, working from the center outward to create a slight mound around the edges for even baking.
-
Bake for 25 to 27 minutes, or until the top springs back lightly when touched, sounds spongy when tapped, and the sides begin to pull away from the pan.
-
Place the cake on a wire rack to cool for 5 to 10 minutes.
-
Run a small metal spatula or knife between the cake edge and the pan to loosen the sides.
-
Invert the pan onto a wire rack, lift off the pan, and carefully peel off the parchment liner.
-
Invert the cake again so it is right-side up. Allow to cool completely before assembling or storing.
Nutrition Facts
Servings 8
- Amount Per Serving
- Calories 566.2kcal
- % Daily Value *
- Total Fat 17.7g28%
- Saturated Fat 7.2g36%
- Cholesterol 389.1mg130%
- Sodium 734.0mg31%
- Total Carbohydrate 84.2g29%
- Dietary Fiber 1.4g6%
- Sugars 35.1g
- Protein 18.0g36%
* Percent Daily Values are based on a 2,000 calorie diet. Your daily value may be higher or lower depending on your calorie needs.
Note
If using within 2 days, wrap the cooled genoise tightly in plastic wrap. To freeze for up to 10 days, wrap in plastic and then in foil, and place in a sturdy container. Label with the date.
If assembling the torte later in the day or the next day, leave the genoise uncovered on a rack to air-dry slightly. This helps it absorb syrups or fillings more effectively without becoming soggy.
Do not overmix when folding in the flour or butter. Over-mixing will deflate the air bubbles, resulting in a dense cake rather than a light sponge.
The cake is done when it smells like freshly baked eggs and springs back to the touch. Do not under-bake, as the center may collapse.
